Paver Sealing 101: What ‘Resanding’ Means and Why It Matters
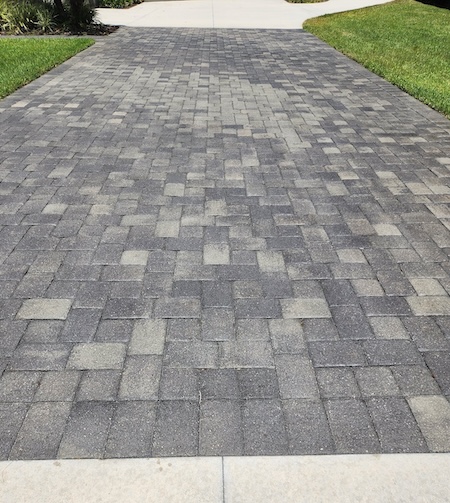
If you are planning paver sealing, there is one step that often decides whether the finish looks great for years or fades fast. That step is resanding. Resanding is the process of refilling the joints between pavers with the right sand so the sealer can lock everything in place. Done correctly, it keeps joints tight, limits weeds, resists washout, and helps color stay rich under sun and rain.
Homeowners sometimes focus only on the topcoat shine. But paver sealing is a system, not just a product. When you see an even, long-lasting finish, it usually means the joints underneath were properly prepared and resanded. If you want to see how professionals approach this as a complete service, explore our paver cleaning and sealing details and notice how joint care is part of the plan.
What Resanding Actually Means
Resanding replaces missing or loose joint material so neighboring pavers support each other. The sand fills the vertical space between units, which reduces side-to-side movement and keeps the surface stable under foot traffic and vehicles. Without sound joints, pavers can shift, settle, and create uneven edges. That movement also stresses the sealer film, causing premature wear.
Today, most projects use polymeric joint sand for its added stability. Polymers help the sand lock after proper activation and curing, which means it resists washout better than basic masonry sand. The result is fewer gaps where weeds and ants can take hold and a joint that partners with the sealer instead of working against it.
Why Resanding Matters Before Sealing
Clean, full joints are the foundation of a strong sealed surface. When joints are topped off and compact, the sealer can wick slightly into the sand and create a light crust that helps hold the joint in place. That stability:
- Limits joint erosion during heavy rain or routine rinsing.
- Discourages weed seeds from settling and sprouting.
- Reduces ant tunneling by removing loose, dry pockets.
- Helps distribute load so pavers resist edge chipping and movement.
Sealers can also include UV inhibitors. Those help reduce color fade on the paver surface by filtering sunlight. Resanding does not fight UV on its own, but it does set up the surface so the sealer can form a consistent, protective film across every edge and joint.
How Sealer And Joint Sand Work Together
Think of the system like a zipper and fabric. The pavers are the fabric, the sand is the teeth, and the sealer is the slider that locks the teeth together. With empty or contaminated joints, the “teeth” do not line up. With fresh, compacted sand, the sealer can do its job. The outcome is a uniform look, smoother water runoff, and a surface that ages more evenly between cleanings.
Most modern projects use polymeric joint sand for stability. It pairs well with professional-grade sealers that are formulated for interlocking pavers. Your technician will match the joint sand and sealer chemistry so the film cures properly and does not haze.
Signs Your Pavers Need Resanding
You do not need a microscope to know when joints are failing. Look for easy, visible cues:
- Joints look low compared to the paver edge or feel hollow when tapped.
- Sand washes out to the edge of your patio after storms.
- Grass or weeds are sprouting between units more often.
- Ant mounds or fine sand trails appear along borders.
- Pavers shift slightly underfoot or edges feel sharp and raised.
Choosing The Right Joint Sand And Sealer
There is no one-size-fits-all choice. Your climate, shade, traffic, and water exposure guide the selection.
Joint sand considerations:
Polymeric sands offer stronger lock-up and resist washout better in heavy rain zones. Standard sands may be used in light-duty areas but typically require more frequent maintenance. Color matters too. Sand that matches or complements your pavers helps the surface look cohesive after sealing.
Sealer considerations:
Finish can range from natural-matte to enhanced-wet look. Where sun is intense, products with UV inhibitors help keep color brighter longer. In splash zones or around pools, slip-resistance and breathability become important. A good match lets moisture escape from below while still shielding the top surface.
Never seal over loose or contaminated joints. Any dust, efflorescence, or organic material trapped under sealer can cause peeling, whitening, or patchy sheen. Professional prep removes these risks before any coating is applied.
Sealing Timeline And Seasonal Factors
Homeowners often ask, “How often should I reseal?” The answer varies by sun exposure, traffic, and the product used. Many patios and walkways benefit from resealing every two to three years, while shaded or low-traffic areas can go longer. Driveways and pool decks with strong sun or frequent use may need attention sooner. Your technician will evaluate wear patterns, water beading, and color fade to set a smart schedule for your property.
Weather windows matter. Sealer and polymeric sand both need dry conditions to cure. Mild temperatures and low humidity lead to the best outcomes, which is why many homeowners plan work in spring or fall. In coastal or very humid areas, cure times can stretch. In freeze-thaw regions, timing the work after a thorough cleaning and before sustained cold helps protect joints through winter.
What To Expect From A Professional Service
Quality providers look at the whole system. They evaluate drainage, borders, and low spots first. They clean the surface thoroughly so sealer bonds to paver material, not to dust. They resand to the right level, then check edges and transitions so joints remain even across the entire area. Finally, they select a sealer that fits your surface and local conditions. That attention to detail is why professional work often looks richer and lasts longer between maintenance visits.
If you would like a deeper look at how joint care fits into a full-service approach, review our page on paver cleaning and sealing. You will see how surface prep, joint stability, and sealer selection add up to consistent results.
Maintenance After Sealing
Once sealed and resanded, pavers become easier to live with. Dirt stays on top instead of soaking in, so light rinsing removes most grime. Leaf stains and rust are less likely to penetrate. Keep surrounding landscaping trimmed so debris does not collect in joints. Avoid harsh deicers that can stress the surface in winter. When you start to notice reduced water beading or dull color, that is a cue to schedule an assessment for resealing and touch-up resanding where needed.
Allow proper cure time before returning furniture or cars. Even when a surface feels dry, deeper layers may still be setting. Early traffic can scuff the finish or create shiny patches that stand out in sunlight.
How Resanding Helps With Weeds, Ants, And UV Fade
Weed seeds need space and light. Full joints cut both off, so fewer seeds take hold between your pavers. Ants prefer to tunnel through loose, dry sand. Locked joints remove that option and make surface treatments more effective if ever needed. As for color, joint sand does not add UV protection by itself, but it supports a uniform sealer film. That film, especially one with UV inhibitors, helps slow the bleaching that intense sun can cause over time.
Common Mistakes To Avoid
- Skipping joint inspection and sealing over gaps that invite rapid washout.
- Using incompatible products, which can cause haze or poor bonding.
- Working too soon after rain or cleaning, trapping moisture under the coating.
- Applying too much sealer per coat, leading to whitening or slick spots.
- Ignoring edges and borders where movement often starts.
Your Sealing Timeline, Simplified
Think in seasons and signals instead of the calendar alone. After a thorough professional cleaning, your technician will check joint depth and stability. If joints are low, resanding comes next, then sealing under the right weather window. The next decision point is not a fixed date. It is based on how your surface behaves: water should bead, joints should feel firm, and color should look even. When those signals change, it is time for a refresher. Linking your paver sealing plans to these cues keeps your surface looking its best year after year.
Durability Starts With Details
Small choices add up. Joint sand level within the recommended range supports edges so they do not chip. Sealer that is matched to your climate keeps the finish from chalking or peeling. Clean site conditions and careful masking protect adjacent landscaping and fixtures. These details are why neighbors often notice the difference between a quick coat and a system built to last.
Ready To Protect Your Pavers?
Protect your patio with professional paver sealing from Alpine Home Services. When you want a finish that resists stains, holds color, and keeps weeds at bay, the right resanding and sealer combination makes all the difference. Our team can assess your surface, explain options in plain language, and schedule work when conditions are ideal.
Have questions about timing or finishes? Call us at 407-890-8778 to talk through your goals and get a plan tailored to your property. If you are comparing solutions now, learn how our paver sealing service integrates joint stability and weather-ready products for consistent results.
Transform Your Home With Our Window Cleaning Specialist in Oviedo & Surrounding Areas!